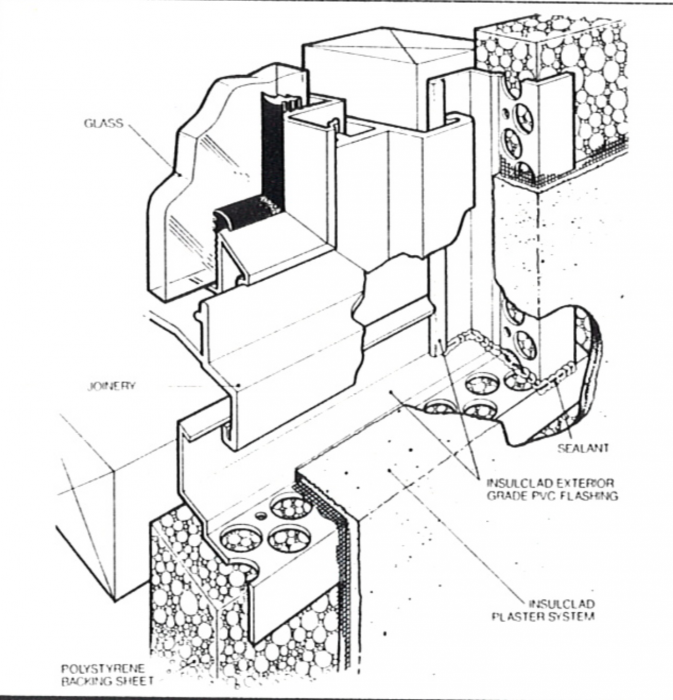
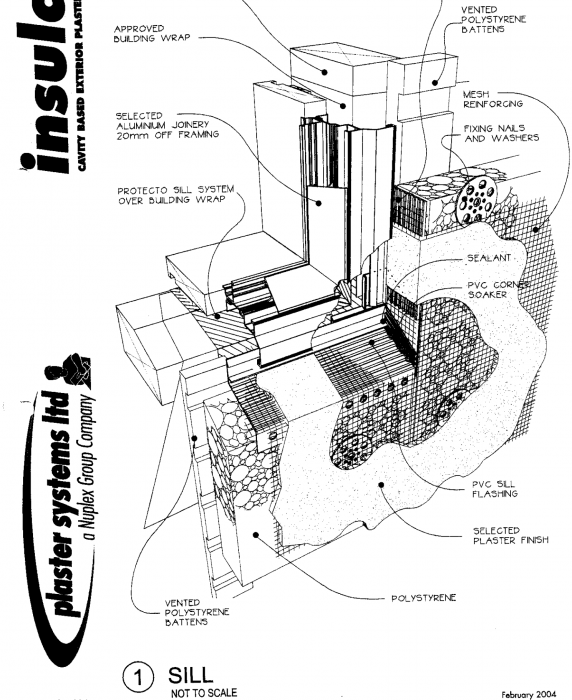
uPVC Window Sill Failure in EIFS Cladding
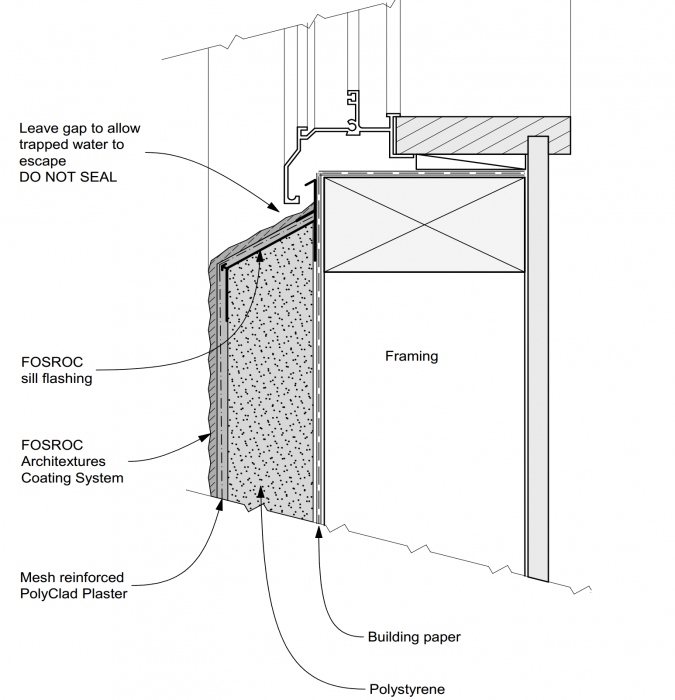
uPVC window sill flashings were widely introduced in the early 1990s to replace earlier plaster-based sill systems used in EIFS (polystyrene) cladding. Failures became evident shortly after installation, including de-bonding, joint opening, and distortion under the plaster. Numerous variations have since been introduced in an attempt to reduce failure at sill and corner junctions. Modified versions of these flashing systems are still used to form window reveals, combining uPVC flashings, polystyrene backing, plaster coatings, and sealants. The performance of the system relies on these materials remaining bonded and continuous. Over time, movement, shrinkage, and material incompatibility can lead to joint separation, allowing moisture to enter behind the cladding.
Why uPVC Window Sills Leak
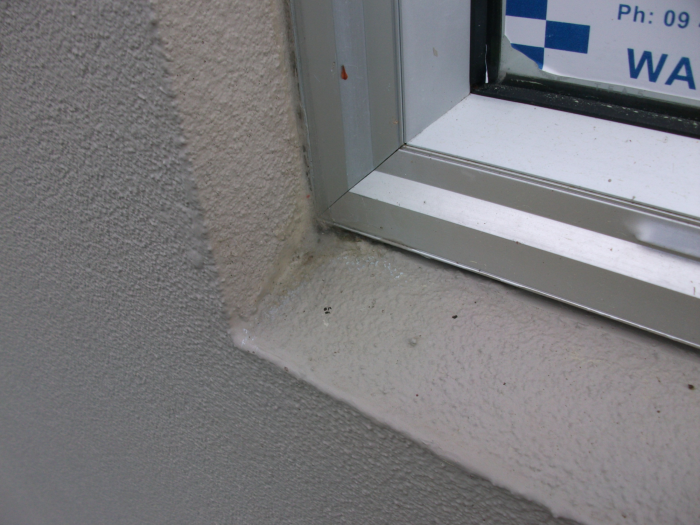
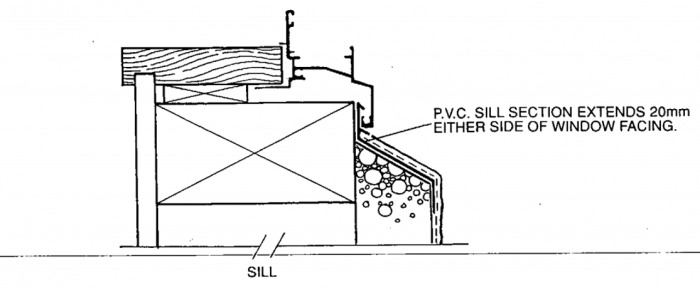
uPVC sill and jamb junctions are vulnerable to movement from thermal cycling. As materials expand and contract, joints can open, adhesives can break down, and sealants lose effectiveness. Typical installation methods introduce a vertical joint in the polystyrene backing directly above the sill-to-jamb junction. This creates a pathway where water can track down behind the cladding and enter at the flashing interface. Gaps at sill ends are also common where the flashing has not been cut precisely to the sill angle, providing a direct pathway for water entry from the time of installation.
How Sill Failure Leads to Structural Damage
Once water enters behind the cladding, it can wet the building paper and framing. Moisture may remain concealed within the wall assembly and is often not visible at the surface. Where timber framing is untreated or lightly treated, prolonged moisture exposure can lead to progressive decay. In treated timber, moisture may persist without immediate structural failure but can still affect long-term durability. Because moisture entry is often hidden, damage can develop over time before being identified.
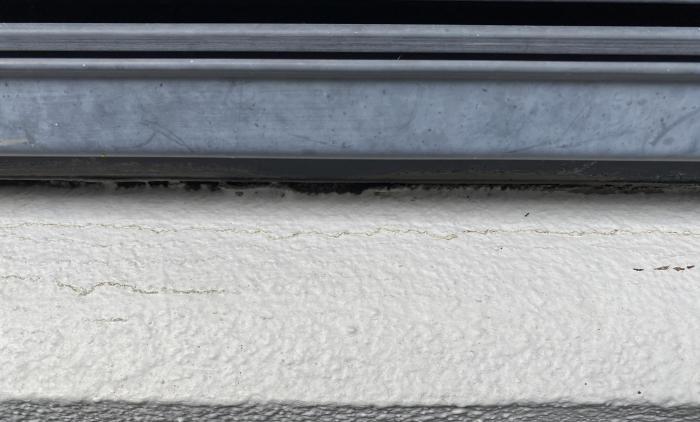
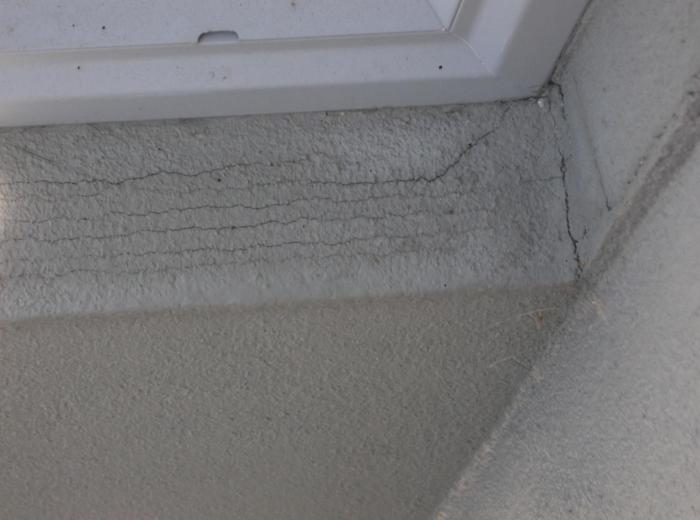
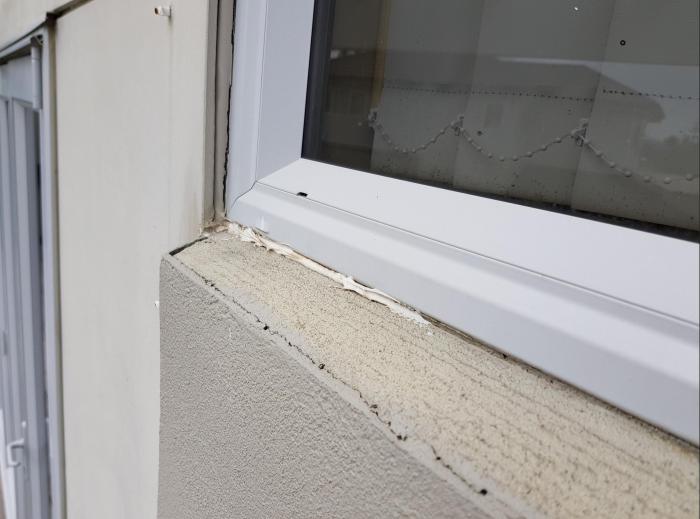
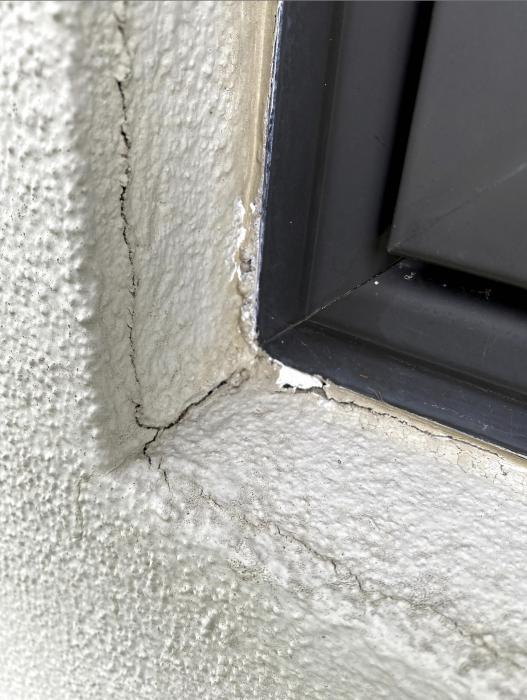
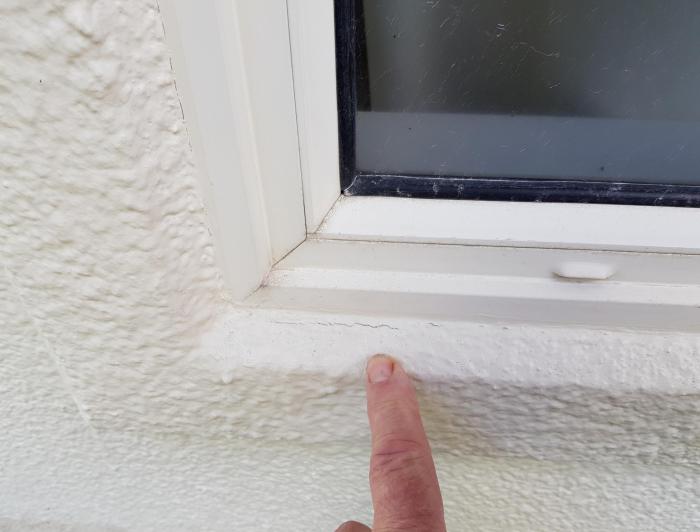
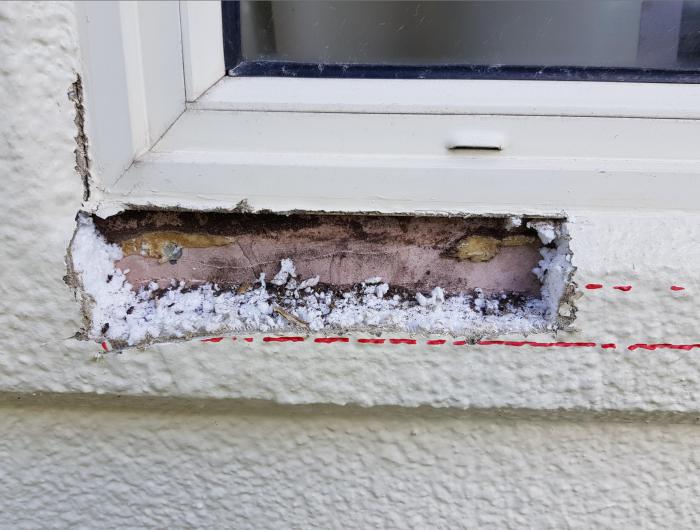
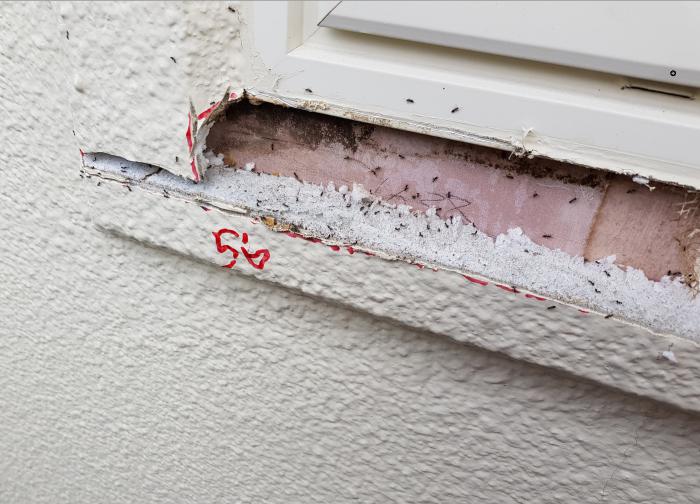
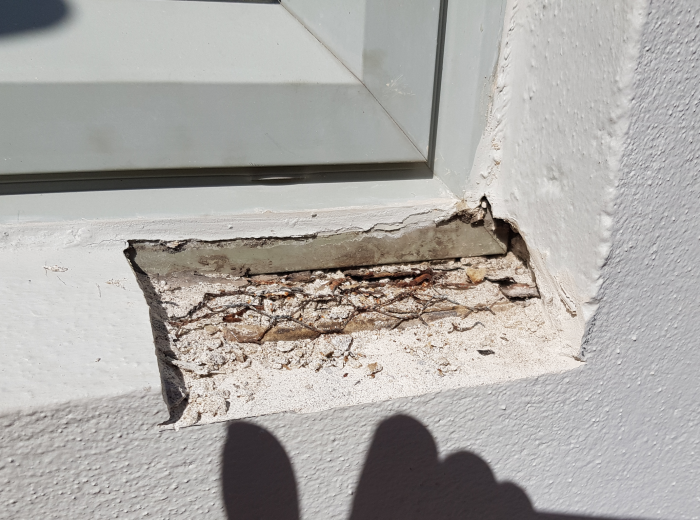
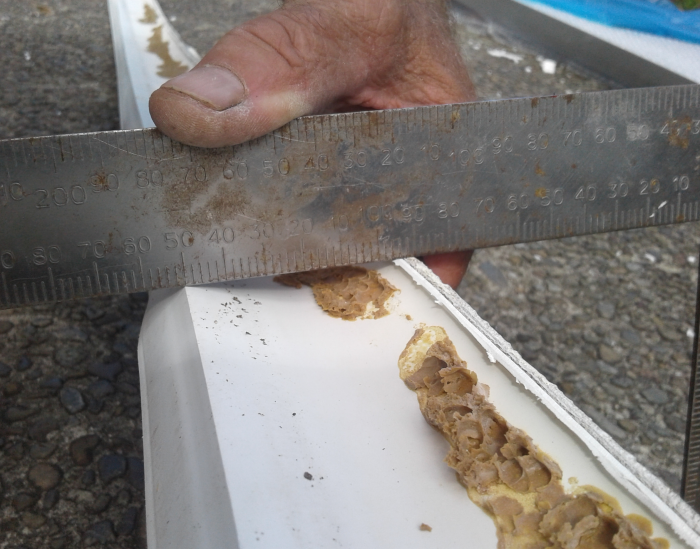
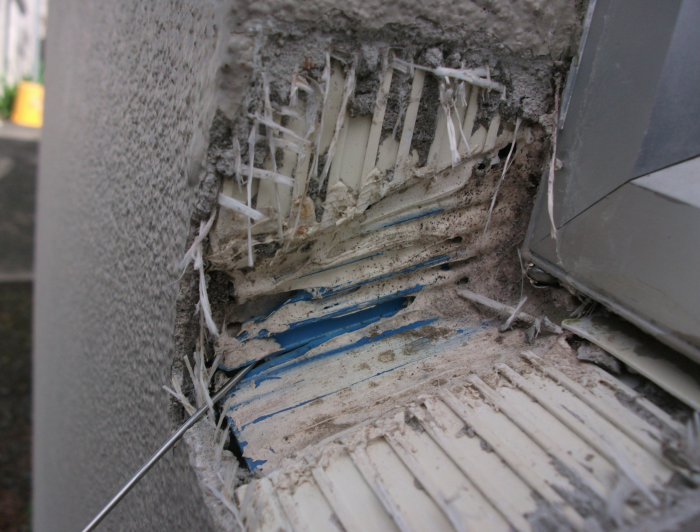
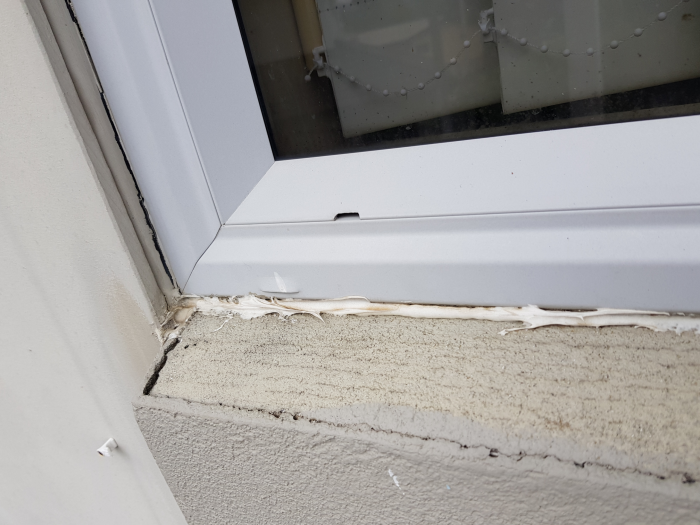
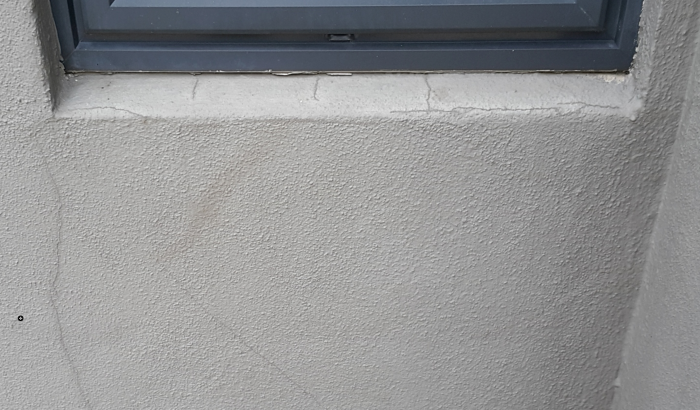
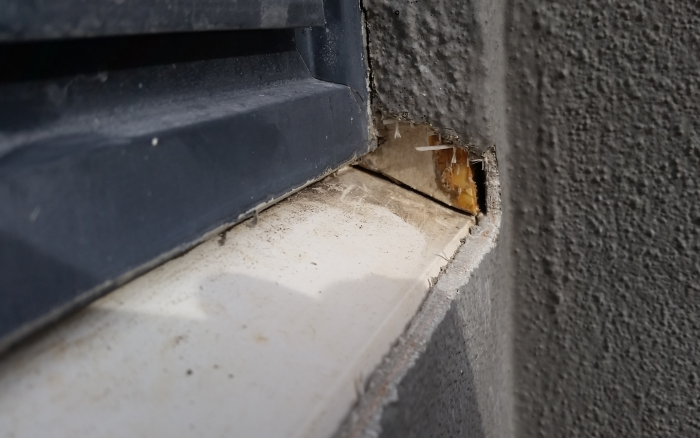
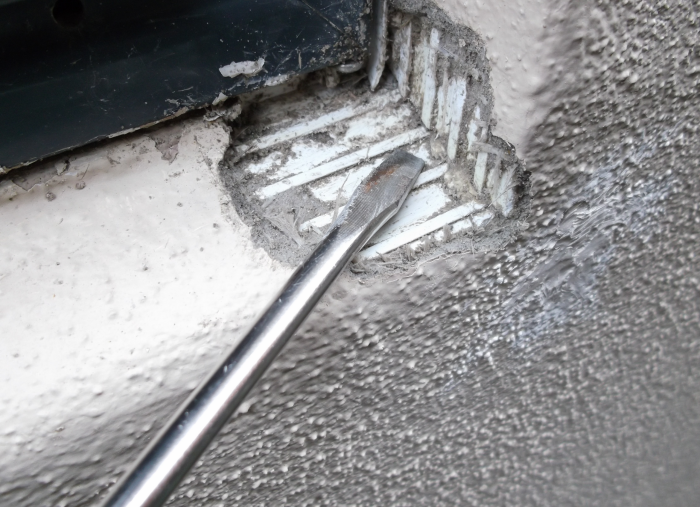
EIFS Window Sill Failure – Real Examples and Cut-Outs
The images that follow show how uPVC sill failures develop and how they are identified during inspection. Typical external signs include cracking at sill corners, horizontal cracking along the sill, and repeated sealant repairs. These areas are often repainted or resealed, masking the underlying condition. When the cladding is opened, separation at sill-to-jamb junctions, failed adhesive bonds, and gaps at sill ends are commonly observed. These conditions allow water to pass behind the cladding and into the wall assembly. Moisture can track down internal joints in the polystyrene backing, entering at the flashing junction and wetting underlying materials.

 logo
logo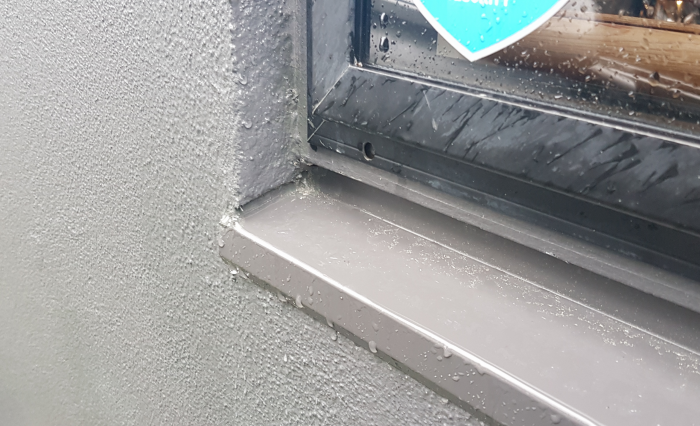
 uPVC Window Sill Failure – EIFS Cladding NZ (Insulclad, Rockcote) FolderExplains EIFS window sill failures